Last year, for our daughter’s 11th birthday, I bought her an iPod Touch as she loves her music. Much to my wife’s chagrin, the Touch also allowed her to freely access the Internet, see videos on YouTube and pretty much leave everything uncensored. Now, I as a person believe in teaching a man to fish rather than dishing it out. So, the obvious discussion – RULES!!! Yes, we discussed RULES and then it was up to me to also enable the tech to enforce some of those. In this blog I reproduce these pointers to help other parents improve their kids’ online security.
Rule #1 – Lay down the Rules
So let’s start with the obvious, what is acceptable and what is not. My daughter who was 11 had an e-mail ID and my son (then 9) didn’t. Facebook is a complete no-no. Screen time includes all screens – TV, IPad, Laptop and IPod and is highly restricted on a daily basis with absolutely no carry-overs. Weekends have longer viewing times. Sites like YouTube are only allowed when an adult is around and preferably on the TV through AppleTV or ChromeCast.
Of course, it is extremely important that this be clear to everyone in the family. Adults need to know what the rules are so that these are not inadvertently skipped and children need to know them so that there are few or no arguments.
Rule #2 – Monitor usage
The first rule can hardly be implemented, if one doesn’t regularly monitor the usage. It doesn’t mean that you keep a diary, but yes, it certainly means, that you know when to say No or Enough! If 5 minutes of an edutainment program is left, it is probably ok to let the child finish viewing it. Elders use your judgment!
Rule #3 – Control Access
Most mail sites will not let you create an ID till the child is at least 13 years of age. However, the need to have one at an earlier age is sometimes genuine. The mechanism to enable this on popular mail sites – provide an incorrect birth year and hey presto, the ID is created. The important thing here is however, to ensure that the control over the passwords is entirely with you and any optional sign-ups are disabled or not chosen. Tip: use your mobile phone and e-mail ID for recovery. This will ensure you can retrieve the passwords if you ever need to.
Rule #4 – No talking to strangers
Why should this be so alien. We enforce it in our daily lives so why not online. And nothing enforces this better than having a direct talk. Schools also contribute a lot these days and talk about cyber-security and as parents, we need to reinforce these.
Bottomline – rules matter and are sacrosanct!!! Switching off the wi-fi is not necessarily the best thing. Teaching, guiding and monitoring gives them life skills.
So, how do you enforce these on the kids’ toys? Recently as I sat with the kids and started them out on programming, I started to discuss the computing world as they use it and hey, there’s a lot of providers for them – Google for mail, Microsoft for Office and logins on their Windows machines, Apple for iTunes and iCloud / iMessenger (no Facebook should not feature here). An exploration of these providers showed how to enable certain features which helps improve the security posture.
Onward to the configurations settings!!!
The Apple devices
Clearly the most loved of them, the iPod, iPad, iPhone requires no introduction, but hey, most devices are left open for kids to use as they please. YouTube is simpler for the next generation than you’d think. Parents take heart, it’s not a completely impossible battle.
Let’s start! Apple has come a long way in the last few years in improving their protection for kids. You can create “Family Sharing” and “Add Family Members” and create kids accounts to ensure:
- All purchases are authorized by an adult
- There is only a single credit card that you provide and it is not accessible to the kids
On the devices, using the same Apple ID and enabling restrictions ensures compliance to your rules.
Creating the Apple ID
On your Apple device, go to iCloud and the “Family” options.
Click on “Add Family Member”, circled in the image above. It’ll give you to option of adding an existing Apple ID or creating a new one. For kids, please create a new one with the appropriate age settings. This will enable you to control their access and purchases. This ID needs to be updated in all the devices the child will use – iPad, iPhone, iPod, MacBook. If you create an Apple ID on the web-site, chances are you’ve set a false date for the birthdate and you cannot use this ID. If your kids are young, abandon that ID and create a new one through your Family sharing. The old ID can always be used once they are a little older.
Setting up the Devices
Well, you have your child’s Apple ID and have gone and updated that in their device(s). Here are the next steps to secure the devices.
Firstly, you will want to turn on restrictions. This ensures that you have control over a lot of features that are provided by default on any Apple Device. For example, in an earlier version of iOS, it allowed one to disable access to YouTube, but guess what? If you left Safari accessible, then you could go to YouTube by simply using Google in Safari and finding the video. It would simply play it and by-pass your YouTube setting.

The option to turn on Restrictions is under “Settings” and “General”. The screen shots show the options on an iPad and on an iPhone / iPod Touch.
Once you select “Restrictions”, to turn it on, it will ask for a passcode. Please use a passcode, which is not common for you and therefore likely to be difficult for your child to guess. Assuming you are like me, aging and getting a bit forgetful, you might want to write it down. But again, where you write it should not be easy for your child to access. Nope, I am not telling you where I wrote it!
Once, the Restrictions Passcodes are set, you have access to the Restrictions Settings themselves (as shown in the images). As you can see, “Safari” has been switched off. This should be done, because you want to install a more secure web browser for your kids. This is the K9 browser. It is free and available through the App Store. Please install this, after you’ve completed your Restrictions settings.
 The “Camera” option is left on as this allows the children to use the camera on the device. Switch it off if you don’t want them to take pictures.
“Facetime” is something that I use with my children. However, feel free to switch it off if you have concerns on who they chat with.
“Siri & Dictation” on those devices that allow it have been left on.
“AirDrop” has been switched off so that sending files, images etc between friends who have Apple devices over BlueTooth is disabled. Prevents sending a lot of unwanted files if friends bring their devices over or your child takes her/his device across. 
“iTunes Store” has been left on as this enables them to download music, apps. “Apple Music Connect” has been left on for the same reason.
“Podcasts” are switched off as it is difficult to curate / monitor the stations they’d be tuning into.
“Installing Apps”, “Deleting Apps” have been left on since they need to anyway get permission before installing an App on their devices, even if it is for free.
“In-app Purchases” have been switched off as this is an easy way to bypass installation of unwanted apps or extensions to games etc.
The “Restrictions” settings also allow you to set the content that your children have access to as well has their privacy levels. 
The “Privacy” settings allow you to set up if they can share their location. With the new versions of iOS, it is a good idea to enable location services so that some of the apps they use can use these services and also if you use “Find Friends” (More on this in another Blog) or “Find my phone”, the device will share the location.
“BlueTooth”, “Twitter”, “Facebook” and “Advertising” are should be locked and the child should not have access to these. By default, these are unlocked and you will need to lock them.

 To enable restrictions on the content they have access to, you’ll need to select “Ratings For” and select the geography (in this case India) for which you want to enable the settings.
For “Films”, selecting the acceptable movie rating for your child, will automatically disable all other rating considered above that level.
For “Music”, switch off the “EXPLICIT” switch to ensure that your child doesn’t have access to music with profanity etc. Note: Profanity is subjective and enabled by Apple’s rating systems. This may not always pass your approval. Always listen to what your child is listening to decide on its appropriateness. However, as a filter, this is a good setting as it will remove a large range of content.
To set the appropriateness of Apps your children can see and download, please set the “Apps” age. In this case, I’ve set it at 9+ for my then 9, now 10 year old son. This will simply ensure that they cannot download and install Apps (including Games) which are not appropriate for their age group.
Finally, the Browser!!! If you notice, in “Allowed Content”, I have not set any restrictions on the web sites. This is because, iOS simply cannot process the billions of websites out there for appropriateness. However, K9 (www.k9webprotection.com) as a browser can. Once, you’re done setting you restrictions, simply exit from the restrictions menu.
Visit the App Store on the device and download K9 Web Browser. Once installed, give it a spin. Here’s a picture of how it looks

As you can see, the browser uses a safe search and also blocks web sites using its vast database of websites categorized across seventy (70) different categories. This browser is available for iOS, Android, Mac OS, Windows. So go give it a spin!!!
The Microsoft Way
Microsoft has certainly not been replaced in your home. If you’re reading this, chances are that your child uses a laptop (most likely) or perhaps a desktop running Microsoft Windows. Well, first and foremost, getting the IDs sorted is important. Unlike Apple, Microsoft IDs can be made with almost any mail ID. So, if you’ve created an AppleID (earlier), you could use this to create your child’s Microsoft ID. Once the ID is created, you need to add this to your own Microsoft ID, by sending an invitation. You need to log in to accounts.live.com and go to the “Family” view as shown in the picture.
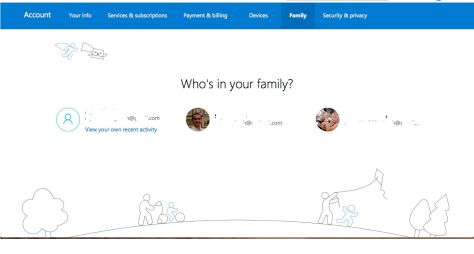
Here you can add members to your family. Select “Add a Child” and use the Microsoft ID you created for the Child. This will send an invitation to the Child to join the family. It is important that you log into the Child account and accept this invitation.
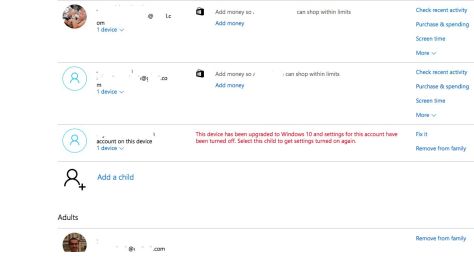
Thereafter, you are master commander and can make several adjustments to the security settings

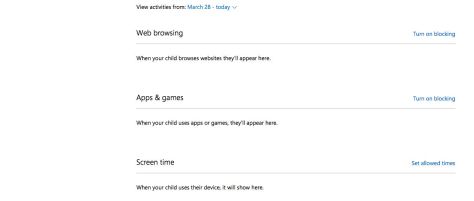
If you continue to use a Microsoft Web Browser on your Child’s machine, then if you set up “Activity reporting” a list of sites that your child visited etc will be reported to you. You can switch off “InPrivate browsing” to ensure that your child is not switching off the history settings on the browser and visiting inappropriate sites.
However, I strongly recommend that you use K9 as a web browser (www.k9webprotection.com) and remove any of the Microsoft Browsers at this point.
The Microsoft settings also allow you to set up controls on “Screen time” which ensures that your child is not able to log into the device if the screen time is exceeded.
Managing Gmail
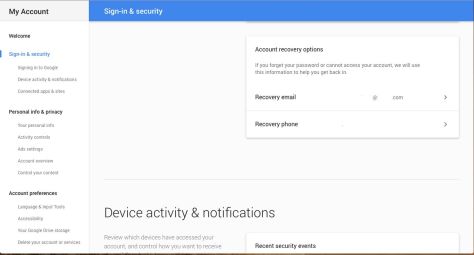
Managing Gmail or any other online mail service requires that you have an honest discussion with your child, if they already have an account. In case, you are creating the account, please set up the recovery email ID and the recovery phone numbers as your details. In either case, you should have the password to this mail account.

An example from Gmail (in the picture). Please select “Sign-in & Security” to correct the recovery mail IDs and phone numbers.
The Home Router and Access to the Internet
There are thousands of ways that the devices can connect to the Internet. Some of these are:
- The Home Router
- The Mobile network on the iPad / iPhone (with cellular support)
- Mobile hotspots at Hotels, Malls, Retail shops, temporarily provided by friends and neighbours
The Home router is usually provided by your Internet Service Provider and in many cases it is locked and managed by them. In the eventuality that you bought yours on retail, chances are you’d be able to configure this for some security settings.
Considering there are thousands of models from which you might have chosen one, I am reproducing the security options available on one of the more popular home routers. Feel free to write to me for help on how to configure yours.
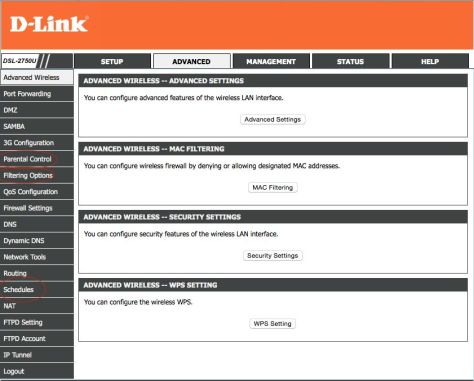
Most routers will have options for Parental Control, Filtering and Scheduling. You can configure some amount of security using these options.
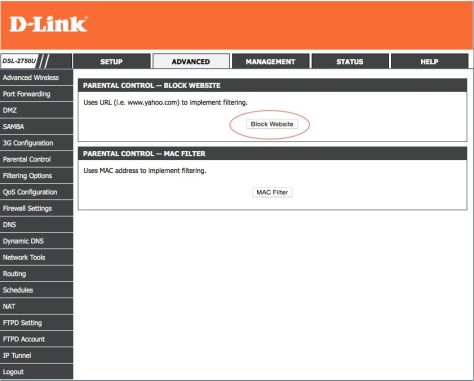
Parental Settings will usually allow you to block websites. In case you have concerns about a site, which is not being blocked by K9 described earlier, you can simply add it in here and the router will block it. Note: This will block the site for everyone and not just your child or a specific machine.
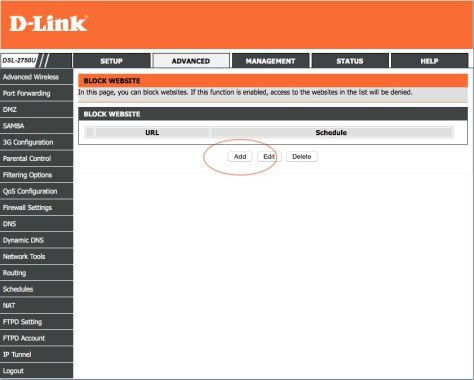
Simply add the site and assign a schedule to it, for the site to be blocked between certain times and/or days.
So Parents, here’s to us to bring up the next generation wisely!!!
 We collected our components in right earnest and went to the market to buy stuff we didn’t have. Here’s what we ended up with – Arduino, Raspberry Pi, USB WiFi dongle, relay board for Arduino, several meters of Reverse Osmosis (RO) water pipes, solenoid valve, power supply, manual valve for water supply connection. We also needed to use several solutions on the Cloud and Internet – an IBM Cloud and a Dynamic DNS account.
 The solution was simple – the plants were lined up in two of our balconies in rows and the RO water pipes were stretched across them. At each plant, a tiny hole was drilled into the water pipe, adjusting the size of the hole to ensure adequate pressure was available till the last plant in the row. The pipes were connected to the apartment plumbing through an electrically operated (solenoid) valve. The valve was connected to the control equipment built using Arduino and Raspberry PI.


